Showing posts with label Jolly Holiday Dies. Show all posts

Saturday, November 3, 2018

PTI MIM #341: Painted Brushstroke Backgrounds

It's time once again for another Make It Monday Challenge at Papertrey Ink. Dawn McVey shows us a quick and easy way to paint beautiful brushstroke backgrounds. She used acrylic paints but since I only have white, I used a paintbrush with my PTI ink pads on Stamper's Select White card stock. Now I want to invest in the same colors Dawn used because they are stunning. Look at her beautiful cards! Can't wait to get my hands on those Brushed Birds when the stamps and dies are in stock at the same time. 


Since I'm pushing myself to get more Christmas cards made, I opted to use Pure Poppy and Pinefeather inks but with light brushstrokes. My foam brushes worked okay, but I can see where acrylic paint colors would be more vibrant. Anyway, it's getting late here so I'll wrap this up and share the two cards I made from my painted background. 


Thank you for stopping by, and I really do appreciate your comments!

Supplies: (all PTI unless noted):
Cardstock: Stamper's Select White, Pinefeather, Berry Sorbet, Ocean Tides and Holiday Plaid
Ink: Pure Poppy and Pinefeather
Stamps: None
Dies: Shaped Sayings: Merry Christmas, Jolly Holiday and Mix & Mat: Pretty Brackets
Other: Silver Glitter Paper, White Acrylic Paint, Paintbrush and Nuvo Drops


Friday, October 26, 2018

PTI MIM #340: Banner-ific!

Good thing I started this challenge early because it took me a few days to get back to finishing this banner. Thanks, Michelle, for the inspiration on this week's Papertrey Ink's Make It Monday! She challenged us to create a banner for the upcoming holiday season. Look at how gorgeous hers is!


Those newly-released stamp sets and dies get me every time...already.  Love her nontraditional color scheme also. 

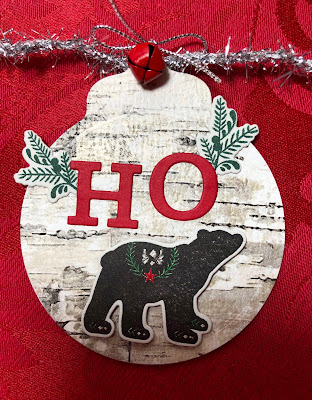
Because I wanted to use my birch wrapping paper I bought last year, I went with the traditional red, white, green & black plus some silver thrown in there to add a little sparkle. Besides my total banner image, I also posted individual ones of all three tags. Looking forward to seeing what others created for this fun challenge!


The birch wrapping paper is quite thin so I backed each tag with two layers of white card stock. This also gives the backsides a nice finished look. 


Thank you for stopping by, and I really do appreciate your comments!

Supplies: (all PTI unless noted):
Cardstock: Stamper's Select White and Pure Poppy
Ink: VersaFine Onyx Black and Pinefeather
Stamps: MIM Mini Kit: Holiday Folk
Dies: MIM Mini Kit: Holiday Folk, Tag Sale #4, Jolly Holiday and Block Alphabet Upper
Other: Birch Wrapping Paper (Pier 1), TH Tinsel Twine, Silver Twine, Darice Red Bells, SU Real Red Marker, Gelly Roll Glitter Dust and Foam Tape


Saturday, November 4, 2017

PTI MIM #302: Twine & Ribbon Wraps

This week's Make It Monday Challenge for Papertrey Ink is presented by Stephanie. She shared ways to use twine and/or ribbon in different ways other than just a knot or bow. Had to think on this for awhile but actually made two cards Friday night (no ink; no stamps), instead of rushing late Sunday night. Besides that, I'm so happy because I've got another Christmas card to add to my stash. Yay for challenges! Once I post this, I'm heading back to my craft room to get creating. Can you believe I haven't touched my Wonderland Kit yet other than to look at its beauty? I must hurry!


Supplies: (all PTI unless noted)

Cardstock: Stamper's Select White, New Leaf, Berry Sorbet, Holiday Plaid, Luxe Gold Adhesive and Canson Mixed Media Watercolor Paper
Ink: None
Stamps: None
Dies: In The Meadow, Wet Paint Holidays, Jolly Holiday and MFT Stitched Rectangles
Other: Gold Twine, Red Sequins and Zig Clean Color Real Brush

*******
And here's just another little "twist" on using twine!


Thanks for stopping by, and I really do appreciate your comments. 


Supplies: (all PTI unless noted)

Cardstock: Stamper's Select White, Green Parakeet and SU Elegant Eggplant
Ink: None
Stamps: None
Dies: Jolly Holiday and Mix & Mat: Postal
Other: Twine, White Acrylic Paint, Paintbrush for Splatters and Double-Sided Tape

Friday, September 15, 2017

PTI Create Along With Us: September 2017

It's that time of the month for Papertrey Ink's new release, and since it's September it's time for their Christmas products. They just never disappoint, do they? It's also our chance to create along with the designers by using their gorgeous creations and/or color schemes for inspiration. How does one choose which one to favor? This time I went with the card below by Michelle showcasing Betsy's new Make It Market Kit.


This is what I came up with using products I currently own. No surprise that I'm eager to get my hands on new sets though as I can't resist their cuteness!


Thanks for stopping by, and I really do appreciate your comments. 


Supplies: (all PTI unless noted)

Cardstock: Soft Stone and Stamper's Select White
Ink: Ocean Tides, Simply Chartreuse, Dark Chocolate and VersaMark
Stamps: Jolly Holiday, In The Meadow, Signature Christmas and Altenew Snowing
Dies: Jolly Holiday, In The Meadow and Noted: Scalloped A2
Other: White Embossing Powder and SU Dimensionals


Sunday, October 2, 2016

PTI MIM #262: Pumpkin Stamps 3 Ways

Nichole's famous last words when it comes to PTI's challenges is to just have fun. This week's Make It Monday by Ashley encourages us to use a pumpkin stamp in three ways. Last Monday I realized I don't own a pumpkin stamp so figured I couldn't play along. Well, I had to get a bit creative so it limited me to only make one card tonight, but I see now I'm not the only one. Hopefully our entries qualify.


For my pumpkin, I traced a cookie cutter from watercolor paper, fussy cut and then ink blended in Orange Zest. Used an H2O brush to add texture to the pumpkin. The stem was traced, cut a second time and stamped in Kraft using the striped stamp from Grunge Me. I also used my H2O brush to blend those lines a bit. With Ripe Avocado ink I colored a piece of white crochet thread before tying a bow around the pumpkin stem.


Black card stock pieces were cut with Jolly Holiday Dies for starry eyes, Birthday Style Die garland piece for the mouth and a 1/4 inch punch for the circular nose.   The sentiment from Scene It: Celebration was stamped on a Kraft Bubble Talk die cut using VersaFine Onyx Black ink. The Rustic Cream card base was ink blended in Ripe Avocado over the leafy stencil from the Garden Gate Kit. My pumpkin and sentiment bubble were popped up to finish this Fall birthday card.


Supplies: (all PTI unless noted)


Cardstock: Rustic Cream, Kraft and Black
Ink: Orange Zest, Ripe Avocado, Kraft and VersaFine Onyx Black
Stamps: Scene It: Celebration and Grunge Me
Dies: Bubble Talk, Jolly Holiday and Birthday Style
Other: Garden Gate Stencil, Pumpkin Cookie Cutter, Ink Blending Tool, White Crochet Thread (dyed), Canon Mixed Media Paper, H20 Brush and SU Dimensionals

Friday, February 12, 2016

PTI's 9th Anniversary Day 5: Sampler Square Challenge

WOW, this was the challenge of all challenges. In fact, several people posted on the PTI Forum for clarification of the rules. This is for Day 5, and here's Nichole's instructions: "…cut nine 1-1/2” squares from white cardstock, then alter all nine of the squares using a variety of techniques, colors, stamps, etc. Be sure to do something different to each square! "

The first challenge was to decide on a color palette, then which stamps would work well in a 1-1/2" square, and which nine techniques to use so each square would be different. My color palette besides Stamper's Select White is: Harvest Gold, Aqua Mist, Hawaiian Shores, Tropical Teal and Gray/Silver with bits of Black. Here's what my 5-1/2" card looks like:


Techniques & Products Used Per Square: Top Left to Right
Square 1: Smooshing + Sizzix Embosslit Beautiful Wings
Square 2: Emboss Resist + Beautiful Blooms II
Square 3: Dry Embossing + Picnic Plaid Impression Plate & Jolly Holiday Die
Square 4: White Shadowing + Iconic Images
Square 5: Ink Blending + Stylish Sentiments: Birthday and Scene It: Celebration
Square 6: Inlaid Die Cut + Jolly Holiday Die
Square 7: Silver Dipped Die Cut (& heat embossing) + Harvest Berries
Square 8: Two-Step Stamping + Rosie Posie & Rosie Posie Step 2
Square 9: Ombre Stamping + Ruby Reprise


I know just the friend who will be receiving this because she saves all the cards I send her. She will appreciate the hours I spent creating and designing this. Admittedly, it was a fun challenge but not something I'd make on a regular basis because I just don't mail 5-1/2" cards. I'm an A2 kinda gal!


Supplies: (all PTI unless noted)

Cardstock: Stamper's Select White, Hawaiian Shores, Harvest Gold and SU Going Gray
Ink: Aqua Mist, Hawaiian Shores, Tropical Teal, Delicata Silvery Shimmer, VersaMark and White Pigment
Stamps: Rosie Posie, Rosie Posie Step 2, Beautiful Blooms II, Iconic Images, Stylish Sentiments: Birthday, Scene It: Celebration, Harvest Berries and Ruby Reprise
Dies: Jolly Holiday and Sizzix Embosslit Beautiful Wings
Other: VersaMarker, Silver and Clear Embossing Powders, SU Ticket Corner Punch, Corner Rounder, Rhinestones/Gems, Gelly Roll Glitter Pen and Patterned Paper (stash)


Wednesday, November 25, 2015

Papertrey November 2015 Blog Hop Challenge

How did we get to the 25th of November already? Anyway, Nichole challenged us to create a project for this month's Papertrey Ink Blog Hop using nontraditional colors for holiday, or non-holiday. This is such a gorgeous image ~ love the colors!


 Blog Hop Inspiration
photo source: Centsational Girl 


To create my card, I started with a Simply Chartreuse card base and a cut from Tipped Tops Dies for my image. I die cut the tree from In The Meadow and used the negative to blend some Simply Chartreuse ink for the tree shape. To decorate the tree, I die cut several circles (2 sizes) for ornaments from Sketched Shapes and stamped them using Delicata Silvery Shimmer. My star was cut from Holly Holiday using Silver Glitter Paper. A silver line was drawn around the edges before adhering it to the card base tied with a piece of silver twine. The Merry Christmas sentiment says it all, die cut from Silver Glitter Paper. 


Hopefully, I'll find time to hop and comment in the next few days. Thanks for visiting. 
Happy Thanksgiving!


Supplies: (all PTI unless noted)

Cardstock: Simply Chartreuse, Stamper's Select White, Hawaiian Shores and Tropical Teal
Ink: Simply Chartreuse, Delicata Silvery Shimmer and Memento London Fog
Stamps: Sketched Shapes
Dies: Tipped Tops, Jolly Holiday, Sketched Shapes, In The Meadow and Wet Paint Holiday
Other: Blended Tool, Sponge, Silver Glittered Card Stock (Joann), Silver Twine and Silver Bic Marker

Sunday, November 1, 2015

PTI MIM #228: Pearlized Blending

Can you believe I owned a package of Perfect Pearls but never opened them? To be honest, I hadn't checked to even see how to use them. Thanks, Lizzie, for sharing your talents with us for this week's Papertrey Ink Make It Monday. Now I know how to add pearlized ink blending to my cards, as you'll see on today's card.


Lizzie's video was so detailed telling us step-by-step what supplies to use and how to achieve results. My card base is Stamper's Select White, which was masked using a die cut from Fabulous Frames so I could work the magic of pearlized ink blending. After stamping Fancy Flourishes using VersaMark ink and clear embossing those flourishes, I blended Spring Rain and Blueberry Sky. Smooshing my sponge into my VersaMark ink pad, I then very thoroughly dapped it over my inked area still leaving my mask in place. Once done with that, I sprinkled that area with Confetti White Perfect Pearls and worked it around with a paint brush. Using a dry paper towel, I then wiped off the excess. That was pretty magical as you can see the shine above. 

I die cut Fabulous Frames again in Soft Stone and Sheer Basics Vellum polka dots. My Simply Chartreuse trees are from Jolly Holiday and stamped using Pinfeather ink. "Joy" from Wet Paint Holiday was cut from glittered paper from Joann Fabric. The frame was popped up using SU dimensional. Eager to see what others have created using this technique. Happy November!


Supplies: (all PTI unless noted)

Cardstock: Stamper's Select White, Soft Stone, Simply Chartreuse and Sheer Basics Vellum
Ink: Spring Rain, Blueberry Sky, Pinefeather and VersaMark
Stamps: Fancy Flourishes and Jolly Holiday
Dies: Jolly Holiday, Fabulous Frames and Wet Paint Holiday
Other: Glittered Card Stock (Joann), Perfect Pearls Confetti White, Sponges, Clear Embossing Powder and SU Dimensionals

Tuesday, September 1, 2015

PTI SAF 2015: Pattern, Runway Inspiration and Unconventional Materials Challenges

WOW, I have been one busy gal today but only got six cards made. Didn't want to create too late and not get them posted in time for the challenges for PTI's Stamp-A-Faire so thought I better stop, upload and add them to my blog. For my final card, I chose Laurie's Go-To Pattern #6 and Ashley's Runway Inspiration as shown below.

Laurie

Ashley-recipe

One more challenge I just had to incorporate some way. Even though I don't have my receipt, I did buy these at Home Depot for less than $5 (image below my card). Can you guess what they are by looking at my card? Just might give this one to my DH for our anniversary in October. After 31 years, he's finally getting hardware on his card. (wink, wink)


Well, if you guessed black Magnetic Vent Covers holding up my banners from Sketched Shapes, you are right. Here's a picture of them. 

(bought at Home Depot for $4.77 + tax)


Supplies: (all PTI unless noted)

Cardstock: Stamper's Select White and Pure Poppy
Ink: Sweet Blush, New Leaf, VersaFine Onyx Black and Melon Berry
Stamps: Sketched Shapes and With All My Heart
Dies: Sketched Shapes and Jolly Holiday
Other: Studio 112 Red Heart Adhesive Gems, SU Dimensionals and Magnetic Vent Covers (Home Depot)

Monday, August 31, 2015

PTI SAF 2015: Patterns and Runway Inspiration Challenges

Because I was gone all weekend for a family wedding out of state, my Papertrey Ink Stamp-A-Faire participation started today and is ending late tonight. Using Nichole's Go-To Pattern #11 here, I created my first card. 

Amy

Starting with Spring Rain ink on white card stock, I blended from the top down and finished with Blueberry Sky. Then I stamped my sentiment in Enchanted Evening matching the colored mat which was adhered to a white card base. Trying to get back in the stamping mode, I used the pattern above and went with it. I also used Betsy Veldman's Runway Inspiration here for my color combination. 

Betsy-recipe

So, my card below meets the requirements for the two challenges mentioned above. 


Supplies: (all PTI unless noted)

Cardstock: Stamper's Select White and Enchanted Evening
Ink: Spring Rain, Blueberry Sky and Enchanted Evening
Stamps: Reasons To Smile
Dies: Jolly Holiday
Other: Masking Tape, Glue Dots and SU Dimensionals